Full Pistol Squat Progression For Massive Legs
Hey there, my fitness-loving friend! Are you craving a new challenge that will push your lower body to new heights? Well, buckle up because I’ve got something special for you today.
We are going to explore the wonderful world of pistol squats and how they can help you achieve those massive legs you’ve always dreamed of.
But here’s the thing: pistol squats are no walk in the park. They require strength, stability, and a whole lot of determination. This progression will help you conquer this challenging exercise step by step.
Pistol squat progression is not suited for a complete beginner though. If you are just starting out, you may be better off starting with the squat progression instead.
So, get ready to roll up your sleeves, put on your workout gear, and embark on this leg day adventure with me. Together, we’ll unlock the power of the pistol squat and sculpt those massive legs you’ve always desired. Let’s dive in and get those quads firing!
Level Of Difficulty
Pistol squat progression is not suitable for people who are just starting out, or recovering from injury. Here’s exactly who may benefit from this progression:
- Intermediate
- Advanced
Lunge is the easiest exercise in pistol squat progression. If lunges are still too hard for you, there are a lot of exercises you can try from a squat progression.
Pistol Squat Progression: Muscles Worked
As you would expect, in a pistol squat progression you will mostly work your leg muscles.
But, your core muscles will help maintain stability during the exercises. So, you will also work your core muscles.
Pistol squat muscles worked:
Primary:
- Quads
- Glutes
- Hamstrings
- Calves
Secondary:
- Abs
- Obliques
- Lower back
- Hip flexors
Equipment
You don’t need any equipment for performing pistol squats. But, when working towards your first pistol squat it would be useful if you have some equipment at your disposal.
It doesn’t mean you have to rush and buy everything right now. You can do just fine without any equipment. Or you can use what you already have at your home. This can be a table, a sofa, or a chair.
Equipment:
- Elevated surface (box, chair, sofa)
- Something to hold on to (dip bars, low bar, table, chair)
- Weight vest or dumbbells
Exercises
When working on any calisthenics skill, there is a step by step progression to follow. Pistol squat progression is no exception.
Whatever level you are starting from, you will easily determine exactly where you currently are. You will also instantly see the path that lies in front of you.
But, don’t underestimate exercises that are below your current ability level. When working on any skill, start each workout with the hardest exercise you are barely able to do.
Then do the easier exercise. This would be the exercise that is exactly at your current level. After that, continue one or two steps below your current level to further increase time under tension.
This helps overload your muscles. Which in turn helps increase your strength and muscle size in the process.
To learn more about how to use progressions to quickly create your own custom workouts check out the Complete calisthenics workout guide.
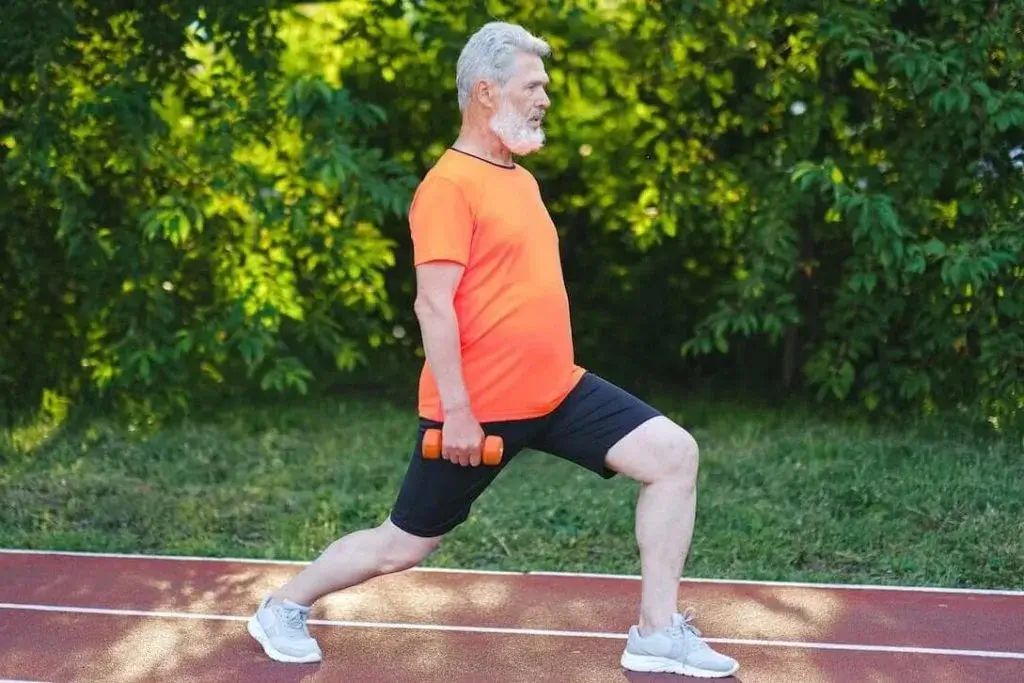
Lunges
The lunge is the first exercise in the pistol squat progression. This exercise moves more tension on one leg at a time. It will work both legs, but not evenly as squats.
Your front leg will work more anterior muscles and your back leg will work more your posterior muscles.
Your legs will not be positioned to your sides as in regular squats, but one in front of the other.
Equipment:
- None
How to perform lunges
Positioning:
Stand with your legs one in front of the other and spread them wide. Your working leg should be bent in your knee. Your other leg will be slightly bent in your knee (almost straight).
The leg you are standing on is your working leg. This leg will bear most of the weight during the exercise.
Downward movement:
Slowly bend the leg on which you are standing by bending your knee and lowering your butt.
Keep lowering down until you touch the ground with the knee of your non-working leg. Hold for a second, but don’t rest on your knee. Keep your working leg fully engaged.
Upward movement:
Start your upward movement by extending the leg on which you are standing by straightening your knee. Keep on moving up until you reach a starting position.
Strive to reach mastery by doing 3 sets of 15 reps.
Prerequisite for next exercise:
- 3×10 lunges
Bulgarian Squats
Bulgarian squats will help you increase the load on your working leg. One leg will be on the floor and another on an elevated surface.
This will load your muscles more than lunges.
Equipment:
- Elevated surface (box, chair, sofa)
How to perform Bulgarian squats
Positioning:
Stand in front of a bench or other elevated surface. If you don’t have access to an elevated surface, you can stand in front of a wall. Place one leg on an elevated surface (or a wall) and stand on your other leg.
The leg you are standing on is your working leg. This leg will bear most of the weight during the exercise.
Downward movement:
Slowly lower down by bending your working leg in your knee.
Keep lowering down as much as you can. Preferably with your working leg thigh forming 90 degrees to your lower leg. When you reach the lowest possible position, hold for a second.
Upward movement:
Start extending your working leg by extending your knee. Keep on raising until the leg you are standing on is straight.
Mastery will be reached when you are able to do 3 sets of 15 reps.
Prerequisite for next exercise:
- 3×10 Bulgarian squats
Weighted Lunges
Weighted lunges are almost the same exercise as lunges. The only difference is the added weight. When adding weight to your calisthenics exercises, go gradually.
Start with a weight that will only slightly increase difficulty. When you feel this weight is no challenge, you can add more weight.
For example, you can start by adding 10 lbs. When it feels like no challenge, add another 10 lbs. 20 lbs of added weight is the targeted weight and will be enough for this exercise.
Equipment:
- Dumbbells or weight vest
How to perform weighted lunges
Positioning:
To see how to perform weighted lunges check lunges exercise above. The movement is the same as in lunges without weight. The only difference is that now you will be holding dumbbells in your hands or wearing a weight vest.
To reach mastery do 3 sets of 15 reps.
Prerequisite for next exercise:
- 3×10 weighted lunges
Assisted Levitation Half Squats
Assisted levitation half squats are the first true single leg exercise in pistol squat progression. It will help you increase the strength of your leg muscles. Great step towards your first pistol squat.
Equipment:
- Something to hold on to (dip bars, low bar, table, chair)
How to perform assisted levitation half squats
Positioning:
Stand in front of something sturdy you can grab and hold on to. For example, this could be a low bar.
Grab a low bar with your hands. Stand straight on one leg. Bend the knee of your other leg.
Downward movement:
To lower yourself down slowly bend the knee of the leg you are standing on. Lower yourself down as much as you can. At this point, your non-working leg knee will not yet be touching the ground.
Upward movement:
Move up by extending your working leg knee. Keep on raising up until you are standing straight again.
To reach mastery do 3 sets of 10 reps.
Prerequisite for next exercise:
- 3×5 assisted levitation half squats
Levitation Half Squats
Levitation half squats will help you get one step closer to a full pistol squat.
Equipment:
- None
How to perform levitation half squats
Positioning:
Stand on one leg (your working leg). This leg should be straight. Your other leg’s knee should be bent. Extend your arms in front of you.
Downward movement:
To lower down bend your working leg slowly and slowly lower your butt down. Go as low as you can. At this point, you will still not be able to touch the ground with your knee.
Upward movement:
To move up again, slowly extend your working leg. Keep on pushing up until you are back in the starting position.
When you are able to do 3 sets of 10 reps you have reached mastery of this exercise.
Prerequisite for next exercise:
- 3×5 levitation half squats
Levitation Squat Jumps
Levitation squat jumps are another explosive exercise in this progression. Its main function is to introduce a different kind of stimulus for your muscles.
Equipment:
- None
How to perform levitation squat jumps
Positioning:
Stand on one leg. Keep this leg straight and extend your arms straight in front of you. Your other leg should be bent in your knee.
Downward movement:
Lower down by bending your straight leg in your knee. Lower yourself down until your standing leg forms approximately 90 degrees angle.
Upward movement:
To initiate upward movement explosively push yourself with the leg you are standing on against the ground. In one swift movement extend your leg so you are completely lifted from the ground.
To reach mastery, do 3 sets of 10 reps.
Prerequisite for next exercise:
- 3×5 levitation squat jumps
Levitation Squat Negatives
Levitation squat negatives will help you get the feeling of a full levitation squat range of motion. It will also help you get one step further in progression.
Equipment:
- None
How to perform levitation squat negatives
Positioning:
To position yourself, stand straight on one leg. This is your working leg. Extend your arms in front of you and bend your non-working leg at the knee.
Downward movement:
To lower yourself down, bend the knee of your working leg as slowly as possible. Keep on lowering yourself down until your non-working leg touches the ground.
Upward movement:
Put your both legs on the ground and raise yourself up to a starting position with the help of your arms.
Mastery for this exercise is when you are able to do 3 sets of 10 reps.
Prerequisite for next exercise:
- 3×5 levitation squat negatives
Levitation Squats
Levitation squats are getting you really close to a pistol squat. They require a little less strength than pistol squats and are great to help you improve your strength even further.
Equipment:
- None
How to perform levitation squats
Positioning:
Position yourself as in the previous exercise.
Downward movement:
Bend your working leg in your knee as slowly as you can. Keep on lowering until the knee of your non-working leg touches the ground. Be careful that your non-working leg foot is off the ground at all times. If you touch the ground with your non-working leg foot, the exercise will be much easier to do – this is not what we are looking for.
Upward movement:
Start moving up by straightening your working leg knee. Keep on moving up until you reach a starting position.
To reach mastery for this exercise do 3 sets of 10 reps.
Prerequisite for next exercise:
- 3×5 levitation squats
Assisted Pistol Squats
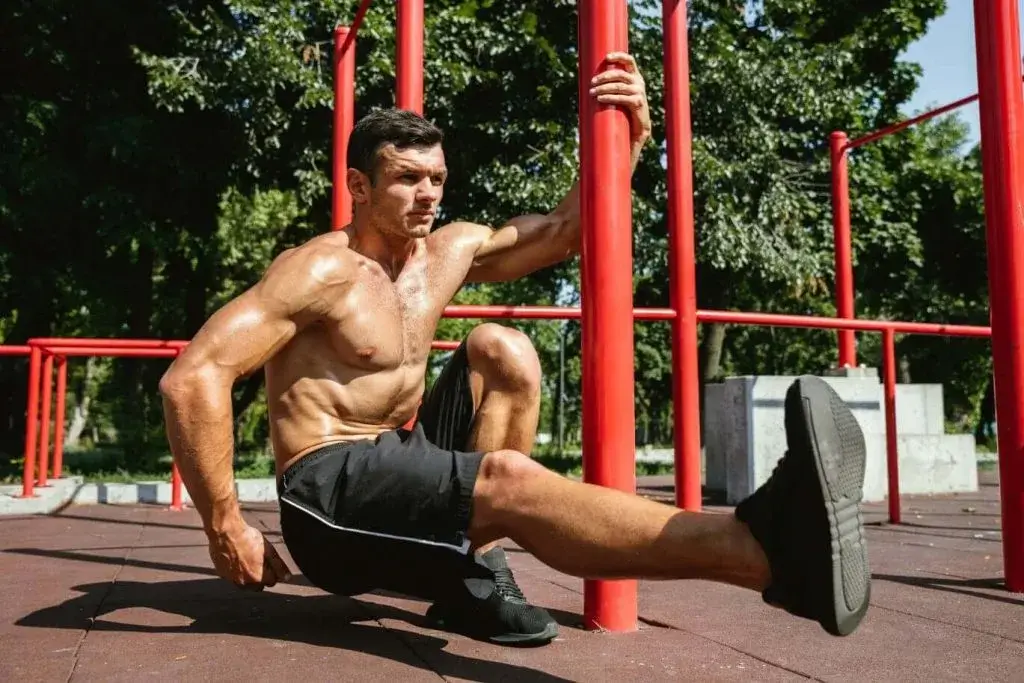
Assisted pistol squats will help you get a feeling of a pistol squat full range of motion. It will also be a great reality check of the strength required to perform this challenging exercise.
Equipment:
- Something to hold on to (dip bars, low bar, table, chair)
How to perform assisted pistol squats
Positioning:
Stand beside something sturdy you can grab and hold on to. For example, this could be a low bar or a pole.
Grab a low bar with your hand that is closer to it. Stand on one leg – the leg that is closer to a bar. Extend your other leg in front of you. When you are starting it will be at around 45 degrees facing toward the floor.
Downward movement:
Slowly bend your working leg by bending your knee. Lower your butt down. The lowest position will be with your non-working leg parallel to the ground and your working leg completely bent.
Your flexibility could be a limiting factor at this stage.
Upward movement:
Move yourself up by extending the knee of your working leg and raising your butt up. Keep holding to a bar and help with your hand as little as possible. Keep on moving up until you are standing straight.
When you are able to perform 3 sets of 10 reps you have reached mastery.
Prerequisite for next exercise:
- 3×5 assisted pistol squats
Pistol Squat Negatives
Pistol squat negatives will help you get a feeling of a pistol squat’s full range of motion. It will also be a great reality check of the strength required to perform this challenging exercise.
Equipment:
- None
How to perform pistol squat negatives
Positioning:
Stand straight on one leg. Extend your other leg straight with toes pointed in front of you. When you are starting it will be at around 45 degrees facing toward the floor. Extend your arms in front of you for balance.
Downward movement:
To go down, slowly bend your working leg in your knee. Keep on lowering down until you reach the lowest position possible. The lowest position will be with your non-working leg parallel to the ground and your working leg completely bent.
Upward movement:
Place your palms on the floor and place both legs on the ground. Help yourself up to a starting position.
For mastery do 3 sets of 10 reps.
Prerequisite for next exercise:
- 3×5 pistol squat negatives
Pistol Squats

It’s finally time to do your first pistol squat.
Equipment:
- None
How to perform pistol squats
Positioning:
Stand on your working leg straight. Your other leg should be extended in front of you straight positioned at around 45 degrees toward the floor. Your arms will be extended straight in front of you.
Downward movement:
Perform the same movement as in pistol squat negative.
Upward movement:
Move back up by extending the leg on which you are standing. You will move up by straightening your knee and raising your butt up. Keep on extending your leg until you are standing in the starting position again.
Repeat those movements for reps.
Pistol Squat Progression: Conclusion
And there you have it! We’ve reached the end of our full pistol squat progression journey.
The key to mastering pistol squats lies in patience, consistency, and listening to your body. It’s not a race, so take your time and progress at a pace that feels right for you. Celebrate every small victory along the way, whether it’s squeezing one more rep or achieving better balance.
And don’t forget to give your legs some extra love with proper warm-ups, cool-downs, and recovery. Stretch those muscles, and nourish your body with nutritious food and plenty of rest. Your legs deserve the best care after all the hard work you’re putting into them.
Now go out there, give it your all, and let those pistol squats work their magic.